Vultr Sign-Up & API Key Guide
Preparation for server setup. Sign up for Vultr, register a payment card, and copy your API key.
Step 1: Sign Up for Vultr
Click the link below to open the Vultr sign-up page.
Open Vultr Sign-Up PageEnter your email address and password, then click Create Account.
You can also sign up quickly using your Google account.
Check the inbox of the email you used to sign up.
Click the Verify Your E-mail link in the email from Vultr.
Step 2: Register a Payment Card
After logging in, click Billing in the left sidebar.
Alternatively, click your account icon in the top navigation and select Billing.
Under the Credit Card tab, enter your card number, expiry date, and CVC.
Then click Link Credit Card.
Step 3: Generate an API Key
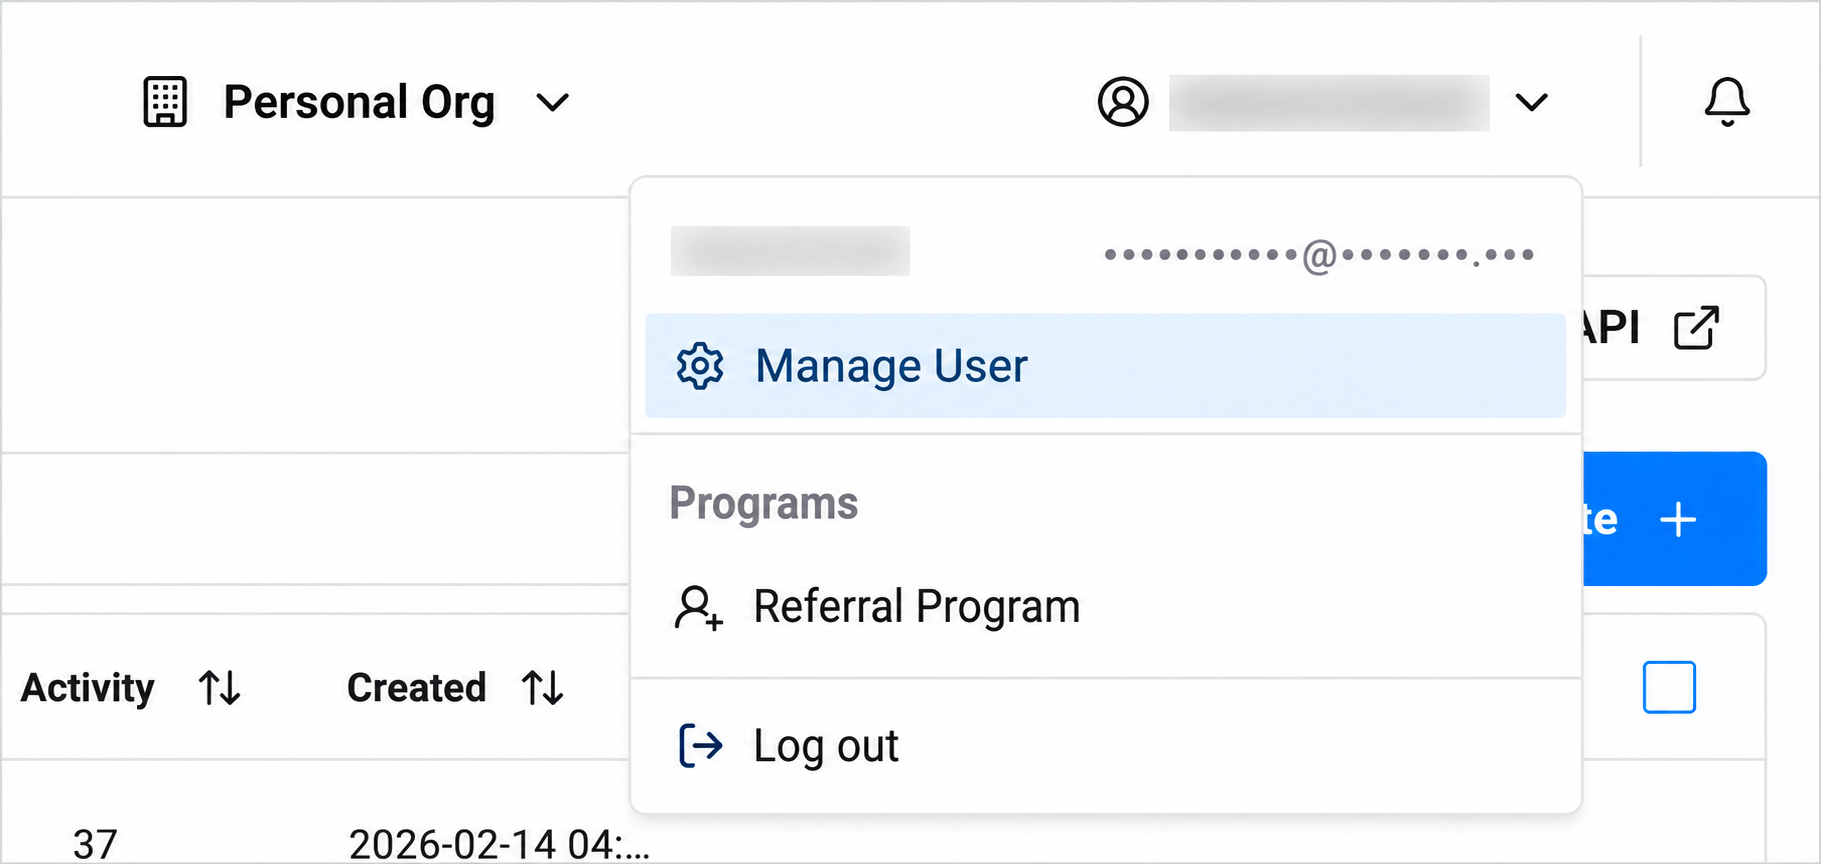
Click your account icon in the top right, then select Manage User.
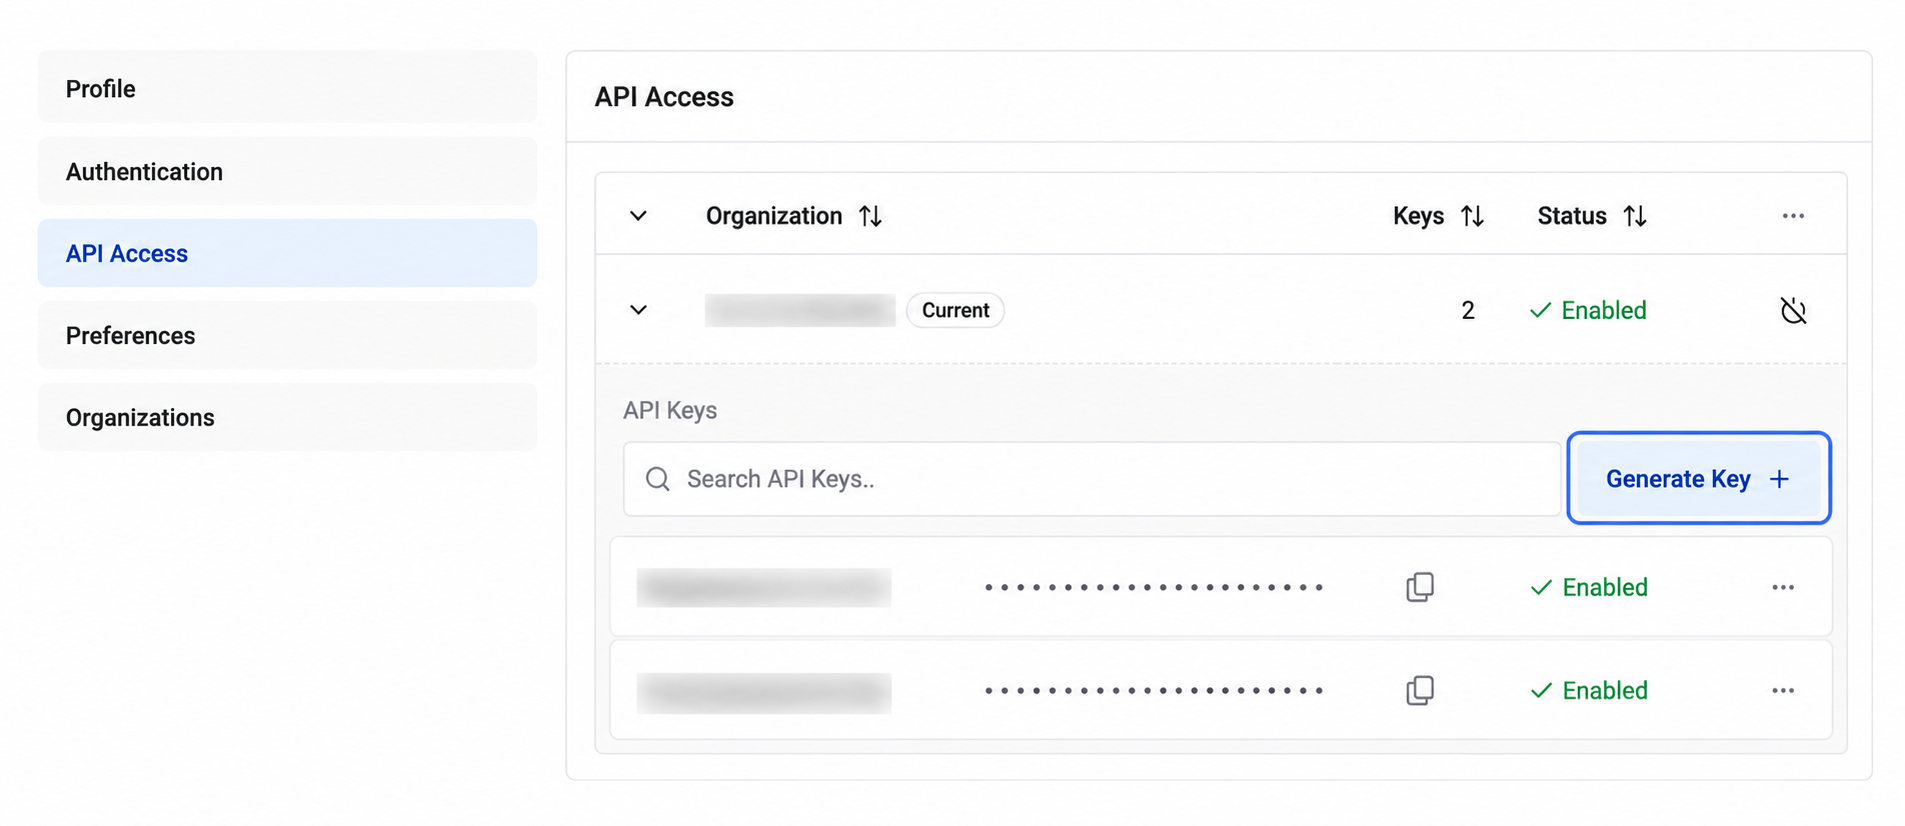
Click API Access in the left menu.
On the API Access page, click the Generate Key + button on the right.
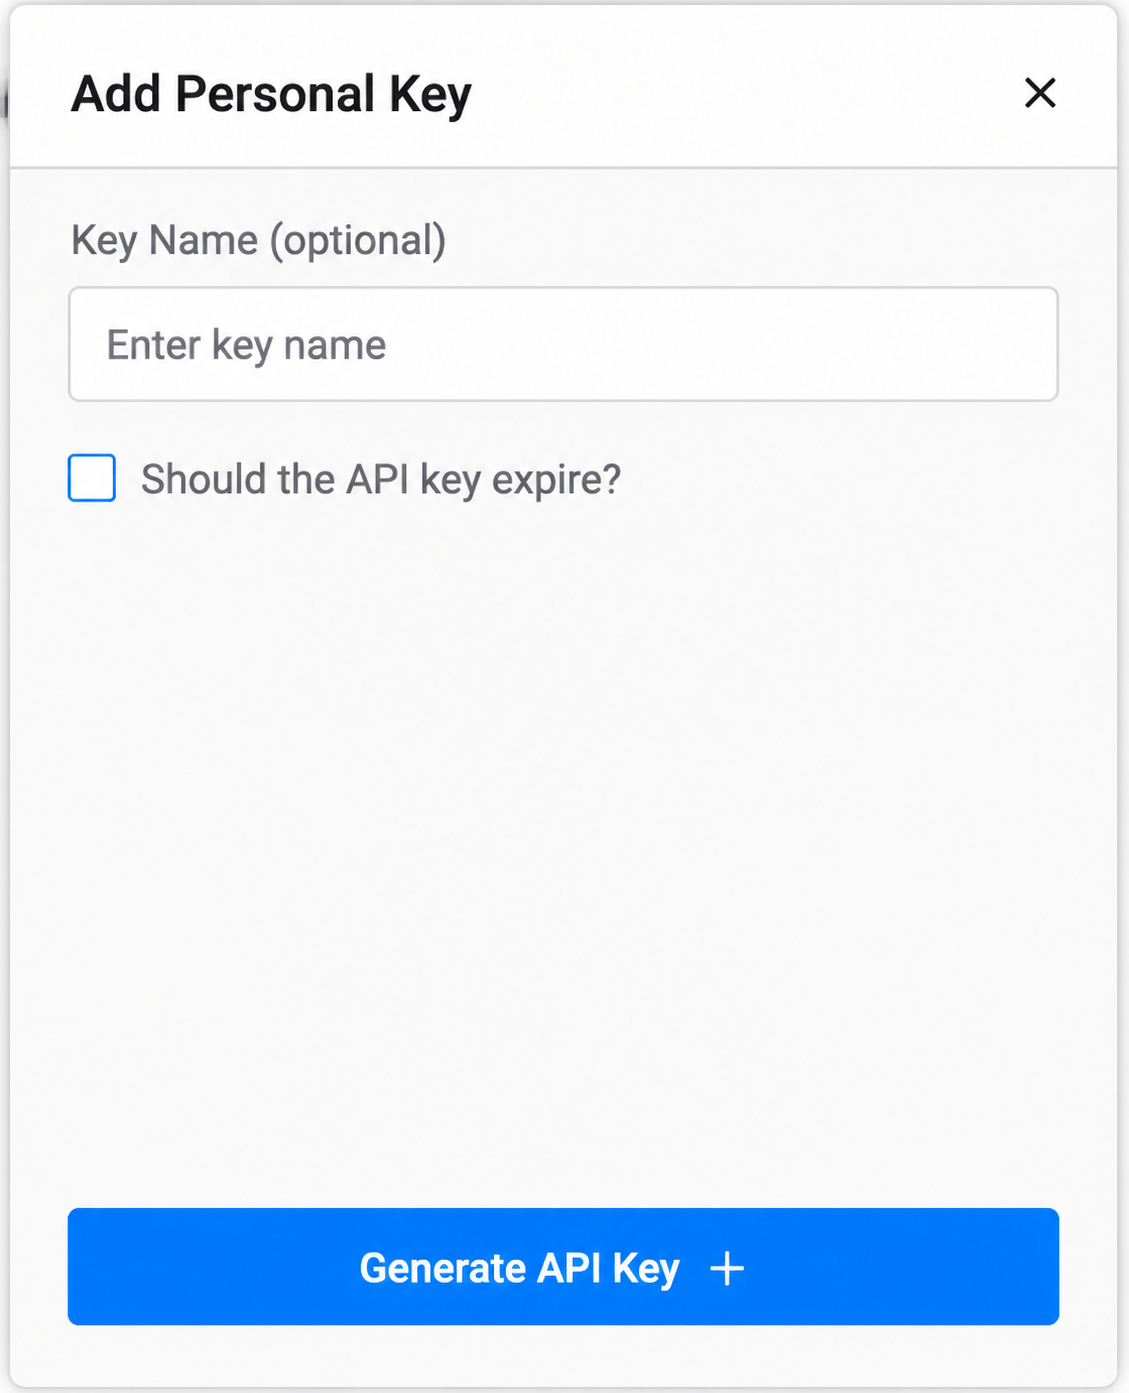
In the popup, enter a Key Name (e.g., kowana-server).
Click Generate API Key +.
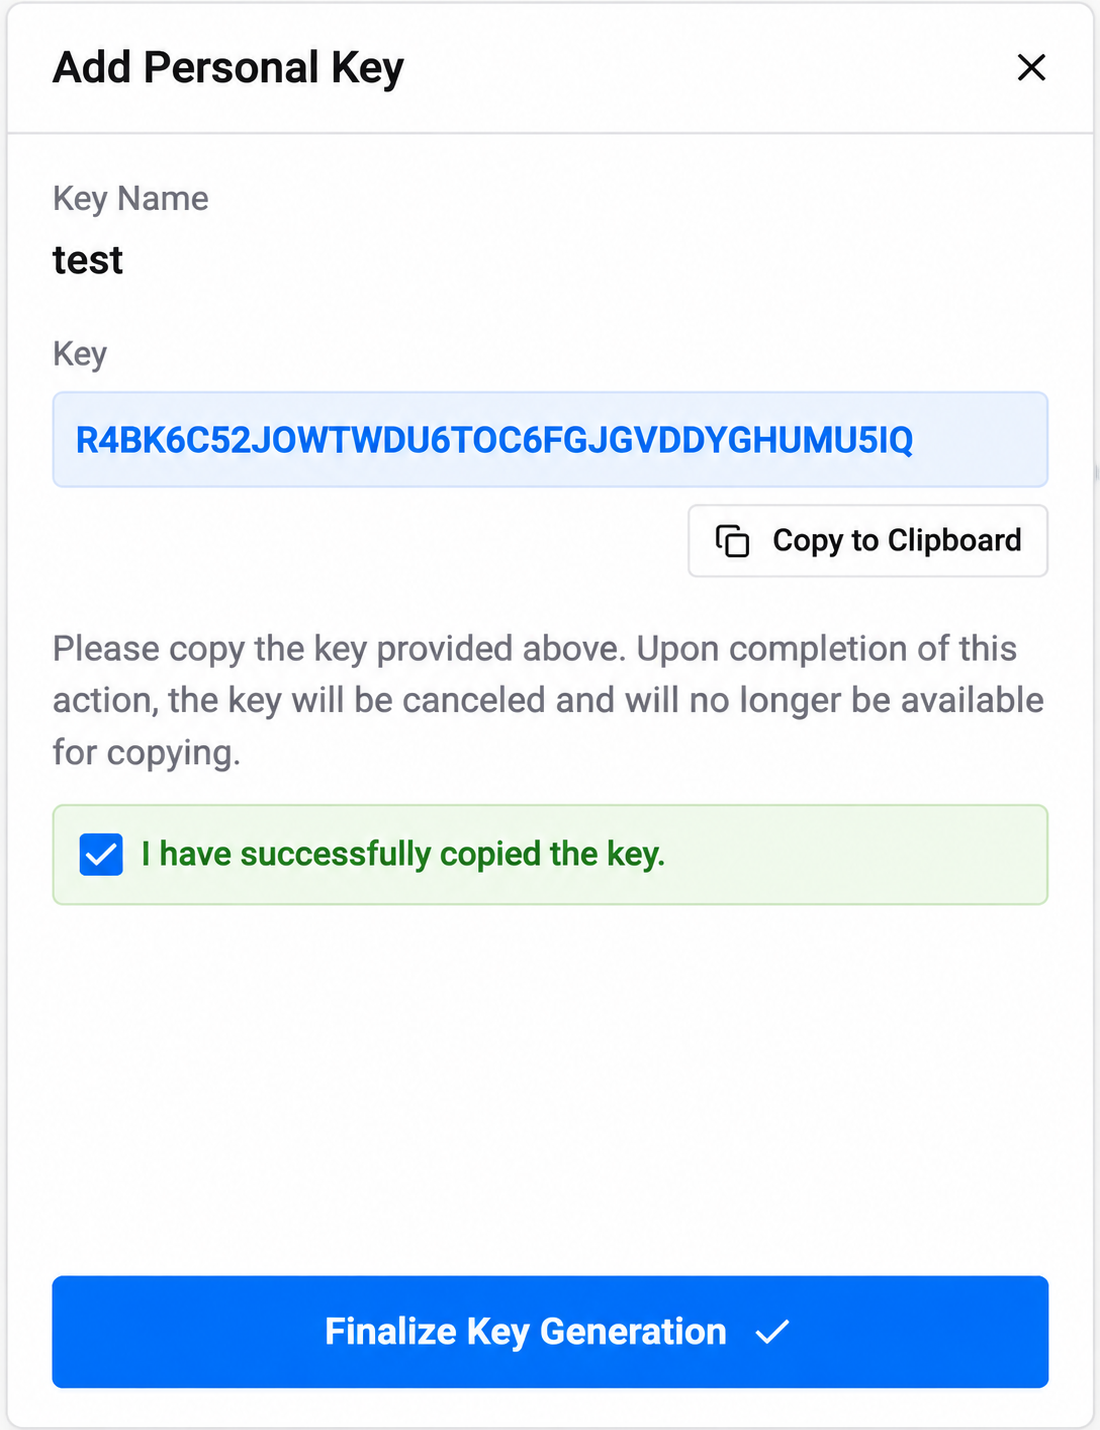
Your API key will be displayed on screen.
Click Copy to Clipboard to copy the key.
Check I have successfully copied the key. then click Finalize Key Generation.